FOR BEGINNERS
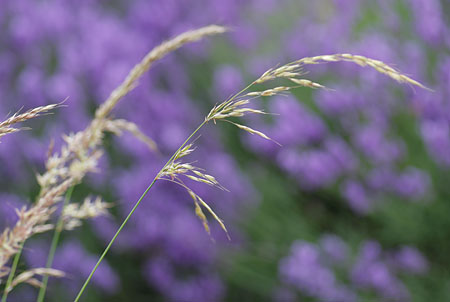
Depth-of-field is simply the zone of sharp focus in a scene, and this can be controlled by the aperture settings. A larger number like from f8 to f22 means large depth-of-field (normally ideal for landscapes) like the first image below. A small number like f4 or f5.6 means small depth-of-field - great for uncluttered backgrounds like the second image below.
Depth-of-field is tricky to understand at first, so go out to practice it. It not only depends on the aperture settings, but also on the focal length of the lens, so a wide lens setting (like 17mm - 35mm) automatically has larger depth-of-field than a long lens (like 50mm - 200mm).

If you're learning about photography, use a small aperture (large number like f/16) if you want most things in focus. This only works in bright light if you're handholding your camera, or anytime with a tripod.
IMPORTANT: The thing to remember about depth-of-field is that when you're looking through your lens you're seeing everything at the smallest f-number the lens has (could be a number between f/2 - f/5.6). This is the way cameras work - they only close the lens down to your chosen aperture during the split second after you've pressed the shutter. This lesson is only important for medium-long lenses (50mm to 500mm range), as they have much less depth-of-field. So, imagine you're looking at the grasses above through your viewfinder with a long lens setting. If you focus on the grass, the background will look nicely blurred as in the second image, because your long lens will show you it at the smallest f-number the lens has (could be f/4 or f/5.6). BUT.....watch out - if you have your aperture set at between f/8 - f/22, you'll be happily seeing the grass image on the right, take the picture, walk away, then when you get home you'll notice that you actually ended up with the first picture! If you wanted the second picture, you'd have to change the aperture to f3.5. This is why I always emphasize this when teaching landscape photography to beginners - check your screen after every shot! So to recap, your camera doesn't act like a 'what you see is what you get' when you have a long lens on. Check your screen carefully and re-take if necessary
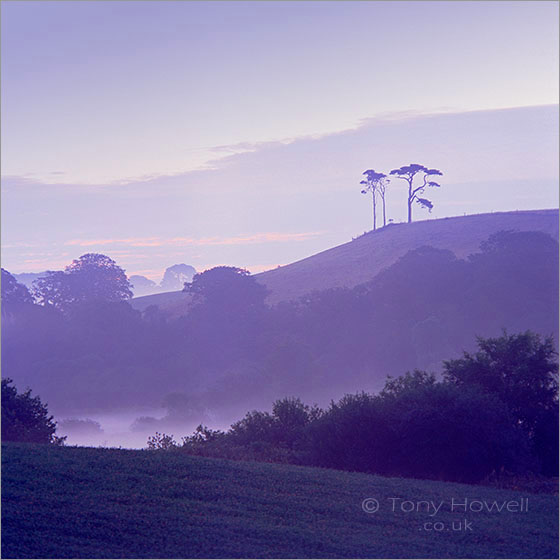
The dawn light image here was taken with a wide lens, and as everything was a fair way away from me, it would all have been fairly sharp even with a small f-number like f4 or f5.6. But if there was a Cow in the bottom left corner (which would have been a lot closer to me than the trees on the hill) I could have used a larger number like f16 or f22 to ensure both the Cow and the trees were in the zone of sharp focus
Depth-of-field is a complex issue, so if you come to Cornwall on holiday, why not come for a one-to-one session
to improve your skills fast? Even a 3 hour session can be really beneficial. Everyone I teach says the same thing - you can see this stuff written down, but seeing it demonstrated is so much easier to understand! Photography
Tuition
Diffraction rears it's ugly head - keep in mind that most lenses are sharpest when used at mid-range
apertures (called the 'sweet spot' - usually f/8). So, if quality is paramount,
use these settings and combine two or more shots, as I did in the example here. I think getting the shot is the most important thing though, so don't let this fact get in the way of a good composition.
FOR MORE ADVANCED PHOTOGRAPHERS WITH PHOTOSHOP
As you become more advanced, you'll want to use the sweet spot more and more as I do, so I often combine two or three exposures,
one focused on the foreground, midground and background, then
combine the exposures later in processing. This is called focus stacking and is easy with a tripod, and can be processed in Photoshop or Photoshop Elements. You simply bring the images in as layers, erasing the softest parts of each image and keeping the sharpest. Photoshop can now do this automatically, but it's good to learn the manual method too, as Photoshop sometimes has trouble deciding what the sharp parts are (e.g. moving water).
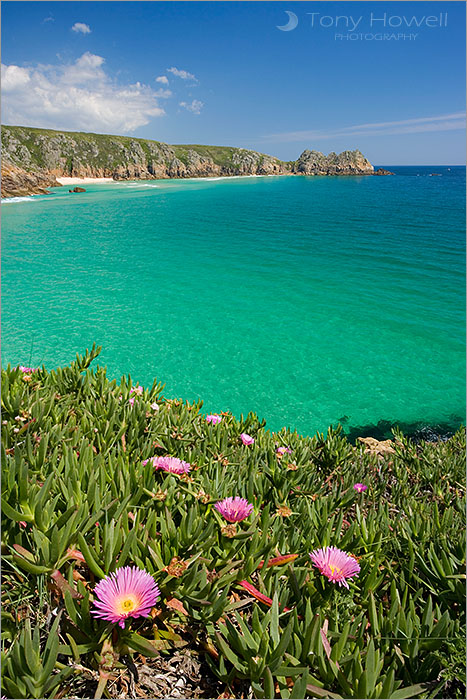
The image below has extreme depth-of-field; both the flowers and the background rocks are sharp - f22 could have been used, but I sell very large prints, so quality is paramount. Therefore I combined two shots taken at f11.
Canon EOS 1DS MkII camera, 17-40mm f4L lens @ f/11, ISO100
More photo tips on my YouTube channel: -
‘My compliments on a truly excellent website......it's fantastic to see a professional spending time on his website to provide hints and tips to people like me. Your pictures also provide me with great inspiration to do better.’ M.P, Plymouth, UK
